Ingredients
Method
- Preheat the oven to 350ºF. Place parchment paper circles in the bottoms of four 6" cake pans and spray with canola spray. I only have one 6 inch cake pan, so I baked them one at a time.
- Mix the cake mix according to the packaged instructions. Divide the batter evenly into four bowls.
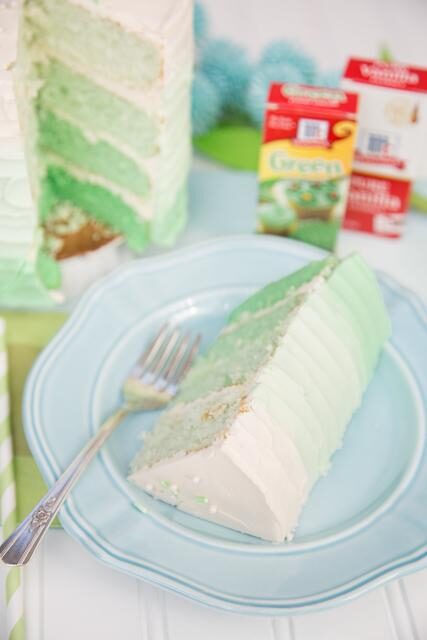
- Place 1, 3, 6, and 12 drops of green food coloring in corresponding bowls. Of course, if you want them lighter or darker shades of green, feel free to adjust accordingly.
- Pour the corresponding bowls of batter into the prepared pans. Bake for 15-30 minutes, being sure to check the cakes with a cake tester every once and a while to see if it comes out clean, making sure not to over cook. Baking time will differ depending on how many cakes you have in the oven.
- Once baked, allow the cakes to cool in the pans for 5 minutes before gently flipping over onto a cooling rack to cool completely.
- Once the cakes have cooled, level the cakes off with a sharp bread knife or cake leveler.
- Meanwhile, make your frosting. (Frosting) First, in your stand mixer fitted with your paddle attachment, beat the butter for 8 minutes on medium speed (KitchenAid speed 4) until light and pale.
- (Frosting) Add in the powdered sugar, milk and vanilla and beat on low (KitchenAid speed 2) for 1 minute until the powdered sugar has mixed in.
- (Frosting) Beat on medium speed (KitchenAid speed 4) for 6 minutes until light and fluffy.
- Now, assemble the cake by placing the first and darkest green layer on a cake plate on top of some parchment paper strips that will allow for your plate to not get frosting on it. Spread enough frosting on the cake layer to cover it. Place the next layer on top, spread with frosting and repeat with the remaining layers.
- Once all of the layers are assembled, spread enough frosting on the top and sides of the cake to make a crumb coat (thin coating). Place the crumb coated cake in the fridge to chill for at 30 minutes.
- Meanwhile, separate the remaining frosting into three bowls (I had about 3/4 cup of frosting for each bowl). Leave one bowl of frosting white and put 3 drops of food coloring in the second and 7 drops of food coloring in the third bowl. Of course put in as much or as little as you'd like. The color will also vary by the amount of frosting you have left from filling and crumb coating your cake.
- Next, spread almost all of the white frosting on the top of the cake and just 1/2" down the side of the top of the cake, all the way around.
- Now, with your darkest green frosting, gently spread a thick 1" layer on the very bottom of the cake, all the way around.
- Finally, with the middle green frosting (one with 3 drops of food coloring), spread between the dark green and white layers on the side of the cake, all the way around.
- Now take a long spreading knife, holding it vertically, smooth out the frostings on the cake. Be sure not to smooth too much, as you'll mix the colors too much.
- Finally, going around your cake with the tip of your rounded spreader knife, spiral your way to the top of the cake. It's okay if you pick up and start spreading again. That will allow the cake to have a rustic feel.
- (Optional) Spread a few different types of sprinkles on the top of your cake for added flare. Keep at room temperature and eat within two days.
Notes
Note: icing instructional video on Sweetapolita. This post has been sponsored by McCormick. I received samples and compensation for this post. All opinions stated are my own.